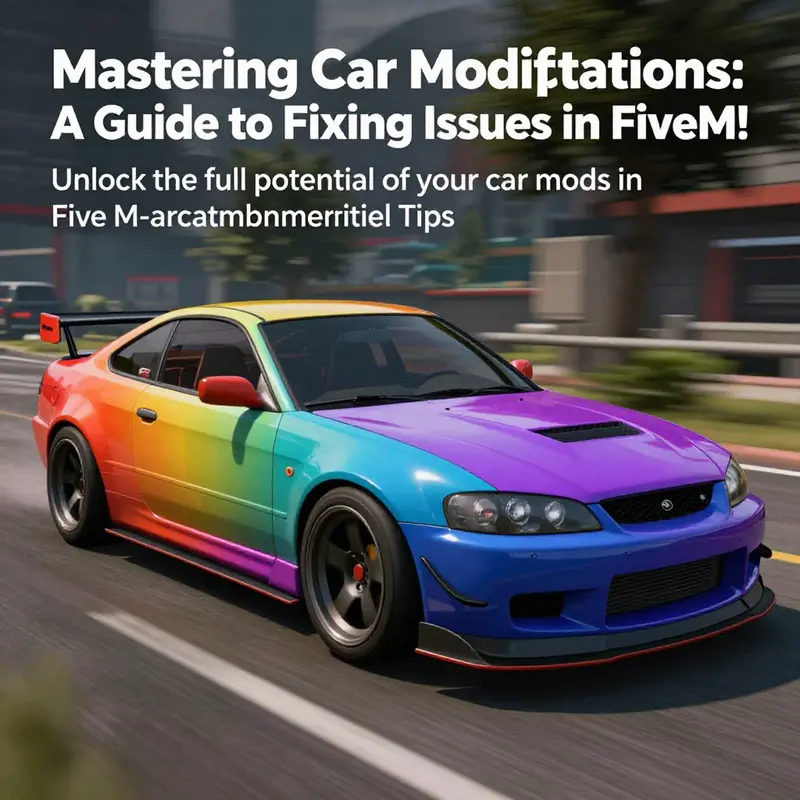
Car modifications in FiveM can enhance the gameplay experience and reflect personal style, but they don’t always work as intended. Hobbyists, tuners, and restoration enthusiasts may find themselves frustrated when their carefully chosen modifications fail to load or function correctly. These issues often stem from overlooked details or common conflicts within the game environment. In this guide, we’ll dive deep into three critical troubleshooting chapters that can help you diagnose and resolve these problems: verifying game files, checking for conflicting resources, and ensuring both FiveM and GTA V are updated. By understanding these key areas, you’ll not only fix current issues but also enhance your modding experience in the vibrant FiveM community.
Repairing the Foundation: Verifying Game Files to Fix FiveM Car Mods
Why verifying game files matters for car modifications
When a custom vehicle won’t spawn, textures are missing, or handling behaves oddly in FiveM, the root cause is often not the mod itself. Many problems trace back to the base game files that the mod depends on. Verifying those files is a foundational troubleshooting step. It forces the launcher to compare local files with the original installation, repair corrupted items, and restore any missing assets. That alone will resolve a surprising number of mod issues because custom content layers on top of the game’s core resources. If those resources are incomplete, the mod has nothing reliable to reference.
Understanding what verification does helps you decide when to use it. Verification:
- Replaces missing or corrupted game files with correct versions.
- Restores default game assets that a broken mod or failed update may have altered.
- Ensures the game’s internal data structures, which custom vehicles reference, are intact.
Attempting to troubleshoot a vehicle mod before confirming your base game files are sound is like repairing a car’s stereo while the battery is dead. The mod may be perfect, but the underlying game cannot support it. Verifying files is quick and low-risk, and it eliminates a major class of errors early in the process.
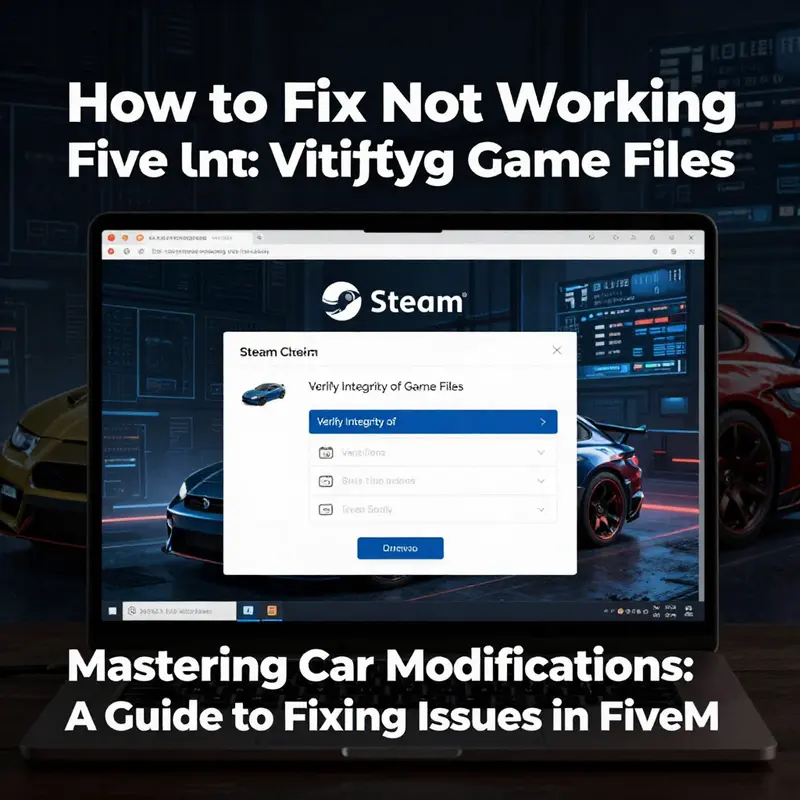
How to verify your game files and what to watch for
Start by locating the verification option in your game client. The process scans game files and replaces any that are missing or corrupted. During verification, you’ll see progress indicators and logs of replaced files. Once the procedure finishes, the launcher may download several hundred megabytes of data. That download often fixes texture glitches, crash triggers, and invisible models.
While the verification runs, take a moment to prepare a few things that will help you act on results:
- Note the exact error messages you saw when the mod failed. Multiplied missing files sometimes show themselves as specific model or texture names in error logs.
- Keep a backup of any custom resource folders you modified manually. Verification won’t touch server-side resources but can affect local installations or shared directories if you copy files into the base game unwisely.
- If you use additional content managers, document which ones are active. Conflicts between third-party tools and verification can reveal deeper integration issues.
When verification completes successfully, relaunch FiveM and check the following in order:
- Can the vehicle now spawn without returning a null model or invisible body?
- Are textures and liveries present and correctly mapped?
- Are handling and physics closer to expected behavior?
If the answers are yes, your problem was likely damaged game files. If not, move on to the next checks with the assurance that the base installation is correct.
Common symptoms that verification will fix
Corrupted base files produce a recognizable set of symptoms. The most common ones include:
- Vehicles appear as invisible or with missing parts.
- Textures are glitched, replaced by checkerboard patterns, or are low-resolution.
- Models fail to load and print errors referencing missing YFT or YTD files in the logs.
- Game crashes during spawn attempts or when applying customization.
If you observed one or more of these, verifying files is the right first action. It eliminates the simplest explanation so you can focus on mod-specific problems if symptoms persist.
Step-by-step verification and practical tips
Execute verification and then follow a short checklist to catch secondary issues:
-
Run the verification tool in your game client and let it finish. Expect any downloads to take a few minutes to over an hour depending on the number of files that need replacement.
-
After verification, restart your system or at least restart FiveM. Some file replacements require a clean start to take effect.
-
Launch a local session or join a test server and spawn the vehicle. Avoid servers with heavy custom content so you can isolate behavior tied to the base game.
-
If the vehicle still misbehaves, check server and client logs for errors referencing file paths, models, or textures. Those messages often point to missing resources in the mod package itself rather than the base game.
-
If logs indicate missing model references, confirm the mod’s files are in the correct resource directory and that the manifest references the files properly.
What verification does not fix
Verification repairs the base game but does not correct issues that originate in the mod package or server configuration. Problems left after verification typically fall into these categories:
- Incorrect resource structure: the mod files are not placed in the correct folders or the resource lacks a proper manifest.
- Mismatched model names: the mod references a model name that differs from the files provided.
- Server-side restrictions: administrators may block certain models or scripts.
- Conflicts with other custom resources: two mods registering the same model name will override one another or create undefined behavior.
If verification leaves the problem unresolved, you’ll need to inspect the mod itself and the server environment.
Integration with other troubleshooting steps
Treat verification as a gatekeeper step. If it clears, proceed with these actions in order:
- Confirm the resource folder placement. The vehicle files must be inside the active server resource directory and the server configuration must include the resource.
- Inspect the resource manifest for proper entries. The mod must declare its models and dependencies accurately.
- Clear the client cache to remove stale or corrupted cached assets that verification cannot touch.
- Temporarily disable other custom resources to rule out conflicts.
Addressing these items in sequence prevents redundant work. Verifying files first saves time because you won’t be chasing mod issues when the base game is at fault.
Practical examples and how to interpret log messages
When vehicle mods fail, logs are the best clues. Two common log patterns appear after verification:
- If errors persist that reference specific file names, such as a model or texture, the mod package likely lacks those files or they are misnamed.
- If logs switch from missing file errors to permission or manifest errors after verification, you have advanced to server-side or resource declaration issues.
Read logs carefully. A model-name mismatch is often resolved by renaming a file or adjusting the manifest. Permission errors may require ensuring the server has read access to resource directories and that you restarted the server after adding new resources.
When to re-run verification
You may need to verify files again in two situations:
- After installing multiple mods in a short time. Conflicting installers or manual copy operations can occasionally corrupt files.
- After a major update to the base game or the mod. Patching sometimes leaves old files behind.
Re-running verification before performing deeper mod troubleshooting sets a clean baseline and avoids wasteful steps.
If verification reveals missing core files
The verification tool will usually restore missing files automatically. If it reports missing files but cannot replace them, check your network connection and disk space. Insufficient space or interrupted downloads prevent successful repairs. Also watch for permission warnings; the launcher must be allowed to write to the installation directory. If issues persist, a manual reinstall may be necessary.
Why verification helps even with server-hosted resources
Many custom vehicle mods rely on shared base game assets. Even when the vehicle models and textures are packaged in the server’s resources, the game still references certain core files for rendering and physics. Broken base files cause strange client-side behavior even when server files are correct. That explains why verification is relevant despite heavy server-side customization.
After verification: quick checklist before declaring success
- Restart the client and optionally the machine.
- Clear the game and FiveM caches if you still see errors.
- Spawn the vehicle in a clean environment to rule out server mods.
- Check client and server logs for new errors.
- If problems remain, move to resource-level checks: file placement, manifest correctness, and dependencies.
If you need a refresher on correct resource structure and installation steps, consult this guide on how to install modifications car.
Bridging to the next steps
Once verification confirms the base game is healthy, inspecting the mod package is the next logical move. Focus on the resource folder layout, the manifest file, and any script dependencies the vehicle requires. If the mod is server-side, ensure the server configuration loads it and that no restrictions prevent the model from spawning. If multiple mods share names or replace the same game assets, isolate them by disabling other resources temporarily.
Verifying game files is the foundation of a methodical troubleshooting flow. It may feel like a basic step, but it removes uncertainty and prevents wasted time. With the base confirmed, the remaining checks become precise and productive rather than speculative.
For community support and cases that need deeper investigation, consult the official FiveM community forum: https://forum.fivem.net
Untangling Car Modification Failures in FiveM: A Focused Walkthrough on Resolving Conflicting Resources
When a modification that should enhance your FiveM experience suddenly refuses to load or behave as intended, the frustration can be immediate and personal. You expect a tweak to breathe new life into a vehicle, but instead you are met with silence, vanished textures, or a car that refuses to respond to the changes you made under the hood of your virtual garage. In practice, not working car modifications in FiveM almost always trace back to one of a handful of root causes. The most persistent and often overlooked culprit is the quiet, stubborn problem of conflicting resources. The FiveM ecosystem thrives on a mosaic of scripts, models, and behavior adjustments that can peacefully coexist when arranged with care. But when two or more resources try to alter the same vehicle property or override the same model, the results can be unpredictable, ranging from partial loading to complete failure to load the modification. Understanding this dynamic is the first and most powerful step in repairing a broken car mod. It converts a trial-and-error debugging process into a methodical investigation, a shift from hoping for a quick fix to orchestrating a reliable resolution.
Here, the path to restoration is less about heroic one-off fixes and more about disciplined alignment. You begin by broadening the frame of your inquiry beyond the mod itself and into the environment where the mod operates: the server configuration, the sequence in which resources load, the compatibility matrix between the mod and other installed resources, and the health of the core game files. This approach treats the problem as a systems issue rather than a single faulty file. It also respects the reality that many players run modified servers, where permissions, custom scripts, and event hooks shape how a vehicle modification is allowed to behave. The aim is not just a working mod for a moment, but a reliable setup that can remain stable across restarts, updates, and occasional community-driven changes in the server’s resource roster.
To begin, picture your server as a theater stage where every actor—every resource—must appear in the right place at the right time. Conflicts arise when two or more actors want to affect the same scene. A vehicle model you’ve added might replace a vanilla asset, while another resource attempts to alter the same model or property at load time. The resulting clash can manifest as texture glitches, missing subclass assignments, or the vehicle simply failing to spawn with the new behavior. The fix is rarely about repairing the original asset in isolation. It is about harmonizing the entire cast of resources so that the modifications you care about get the spotlight they deserve without stepping on the toes of other performers.
A crucial step in this harmonization is to audit the server’s resource list and the order in which those resources load. In many cases, the problem lies not in the modification you’re excited to use, but in an ordering issue that causes a dependent resource to initialize after a replacement or override has already been applied. The server.cfg file, a plain-text script that lists resources to load and the order in which to load them, is your map. It is where you will determine whether your car mod is being prepped before or after core dependencies, and whether anything later in the lineup ends up overwriting the changes you intended to preserve. When you start to read server.cfg with this mindset, the process of debugging shifts from a hunt for a broken file to a careful choreography of scripts. You begin by locating lines that load resources related to vehicles, customization, or textures. You may find entries named in a general way, such as vehiclemods, carcustomization, or a model replacement that sounds familiar, but the exact names are less important than the behavior they imply. The key is to identify any resource that could potentially touch the same vehicle attributes your modification does. It is not uncommon to see two separate resources both attempting to alter handling characteristics or paint schemes for the same model. Once you identify such potential overlaps, you have a concrete path to test for conflicts.
With potential conflicts identified, the next move is to isolate them. Isolation is best accomplished by temporarily disabling suspicious resources. In practice, you accomplish this by commenting out the load lines in the server.cfg or by removing the resource references entirely, then restarting the server to observe changes. The act of commenting out, signified by a leading symbol in many configurations, is your non-destructive testing method. It preserves the original setup while letting you see whether the modification’s behavior returns to expected norms when a suspect resource is not part of the runtime environment. If the car mod begins to behave again after you disable a particular resource, you have narrowed the field. If the issue persists, you continue this process iteratively, testing one suspect resource at a time. It is methodical, but it is a proven way to separate the wheat from the chaff when the scene has grown crowded with scripts and overrides.
Order matters in a very practical sense. The load sequence can determine which resource ultimately governs a vehicle’s behavior. If your core dependencies or a framework your mod relies on are loaded after the mod itself, there is a real risk that later resources will overwrite changes you’ve already applied. Place your mod in a position where it loads after essential foundations but before any resources that would redraw or override its changes. This delicate balance often requires a careful review of the dependencies listed in your resource manifest and a logical mapping of which elements must be established first. When you adjust this load order, you frequently discover that what appeared to be a stubborn fault is merely a mis-timed initialization, where your mod is loaded too early and then undone by a subsequent resource that reverts certain aspects to their vanilla state.
Another practical lens is to review the server logs, which serve as a narrative of what happened when the server started and when you attempted to spawn your modified vehicle. Logs can reveal error messages, warnings, or failed loads that point directly at the conflicting resource. The console often annotates which resource initiated a particular change, and these details are gold when you’re narrowing down the source of a failure. A careful read of the log after a restart with suspected conflicts disabled can confirm whether the mod engages properly, and whether any messages still indicate that another resource is attempting to override the same property. If you notice messages that reference duplicate models, texture overrides, or altered handling that appear twice in the startup sequence, you have a direct cue that a conflict still lingers in the environment.
Compatibility is the other pillar of a robust fix. A modification designed for FiveM has to be compatible not only with the game’s version but also with the server’s core scripts and any other resource stacks in play. An updated FiveM client or GTA V base file can change how certain assets are loaded or how scripts hook into the vehicle. An old mod designed for a bygone version may still load, but it will clash with newer overrides or with a revised API. The most reliable fixes arise from ensuring that your modification is designed for FiveM and is clearly marked as compatible with the server’s resource pack. It is perfectly reasonable to re-download or re-validate a mod to ensure that you’re not dealing with a stale file, a corrupted texture pack, or a mispacked archive that’s masquerading as a complete script.
In many setups, the simple act of clearing cache can resolve a stubborn loading problem that masquerades as a conflict. FiveM caches a lot of assets and scripts to speed up startup and gameplay. Over time, that cache can accumulate corrupted files or partial loads. Deleting the contents of the cache and temp directories can force FiveM to re-fetch fresh copies of assets on the next startup, giving you a clean slate to test your modifications. It is a non-destructive step, albeit one that requires you to re-enter your preferences and briefly reinstall any non-critical settings. The cache refresh can be the quiet hero in a drama where the main actors are performing well in practice but not in the stage lights of a cold startup.
If, after a thorough audit of load order, conflict isolation, compatibility checks, and a cache refresh, your modification still refuses to cooperate, it is time to consider reinstalling the mod. Reinstallation offers a fresh, uncorrupted baseline. It should be performed from a trusted source and with careful adherence to the installation instructions. A reinstall often reveals subtle mistakes that occurred during the initial installation, such as missing assets, incorrect file placement, or overlooked dependencies. When you reinstall, you are not just copying files; you are reconstructing the environment in which the mod must operate. It is the re-commissioning of a complex tool to its intended factory-like state.
Sometimes the root cause is not on your side at all but on the server side. Some servers opt to disable certain categories of vehicle modifications to maintain balance or protect stability. In this context, the server administration holds the power to permit or restrict the kinds of modifications players can apply. If you suspect server-side restrictions, reach out to server administrators or consult the server rules and documentation. A modification may be perfectly sound technically, but the server’s policy overrides it or blocks its operation in certain circumstances. This kind of constraint can be easily mistaken for a faulty mod when the reality is a policy choice reflected in the server’s configuration. A quick conversation with administrators can save hours of troubleshooting if the answer is simply that a particular class of vehicle modifications is not supported on that server.
Finally, a disciplined approach includes testing the same modification on a different server. If the modification behaves correctly on one server but not on another, the issue is almost certainly server-specific rather than a universal fault with the mod itself. Different servers run different versions of the core assets, different dependencies, and different policies about what can be changed. This test acts as a litmus test for environmental variance. When possible, use a server with a known, stable resource roster and a clear policy on vehicle customization. If the modification runs cleanly there, you can carry that knowledge back to your original server and re-run the conflict-resolution steps with a clearer lens, knowing the mod itself is sound and that the problem lies within the server’s particular mix of resources and settings.
The journey from a not-working car modification to a reliable, working setup is rarely a single-seam repair. It is a careful, iterative process of diagnosing conflicts, testing assumptions, and aligning the components that must cooperate for a vehicle mod to function. It requires patience, a willingness to dismantle and reassemble the loading order, and an understanding that the FiveM environment operates as a living ecosystem rather than a static bundle of files. When you approach the problem with this mindset, the path toward restoration becomes less about quick fixes and more about sustainable configuration. You gain a deeper appreciation for how a server’s resource ecosystem shapes the behavior of every modification you bring into the garage, and you emerge with a practical framework for keeping car mods aligned with the evolving world of FiveM.
As you apply these principles, you may find that a single, well-timed adjustment—such as reordering load sequences or temporarily disabling a resource that you wouldn’t ordinarily suspect—unlocks a cascade of corrected behaviors across multiple vehicles and modifications. The confidence you gain from seeing a known-good baseline emerge again is invaluable. It tells you that the problem was not a mysterious fault in the mod’s code but a manageably adjustable relationship among the components. This is the essence of troubleshooting in a platform as interconnected as FiveM: you learn to listen to the system’s feedback, interpret the subtle signals of the console and logs, and then make precise, reversible changes that restore harmony rather than disrupt it further.
For readers who want a more hands-on, model-agnostic reference to the broader mechanics of car modification within FiveM, a practical resource on installation and best practices can be a helpful companion. See the car-modifications-guide for a structured overview of how to approach a modification’s installation and verify its components align with the server’s expectations. This guide complements the workflow described here by offering step-by-step checks that you can carry into your own testing sessions. It helps you translate the abstract concepts of conflicts and load order into concrete actions you can perform in real time as you tune your server and your vehicle mods.
In the end, the goal is a resilient setup where your car modifications behave predictably, even as the server environment evolves through updates, new resources, and community-driven changes. When you treat conflicts as the primary fault and approach resolution as a process of systematic isolation and reassembly, you reduce frustration and increase the odds that your favorite customizations will remain usable across play sessions. The chapter you now read is not merely a how-to checklist but a philosophy: maintain order, respect dependencies, monitor feedback, and test across environments. With that mindset, the not-working car modification becomes less a mystery and more a solvable problem that expands your enjoyment of FiveM’s vehicle customization possibilities.
Internal link reference: for a structured guide to installing and validating car modifications, you can consult the internal resource on car modification procedures: car-modifications-guide.
External resource for further guidance: for a broader perspective on conflicts and resource loading in FiveM, visit the official forum discussion that addresses how conflicting resources can arise and how to resolve them: https://forum.fivem.net/t/fixing-conflicting-resources-in-fivem/1234567
Keep Mods Working: Updating FiveM and GTA V to Restore Car Mod Compatibility
Keeping both your game client and the multiplayer platform up to date is the single most reliable step when a car modification fails to load in FiveM. Updates change game assets, file structures, and APIs that mods rely on. When those change, a mod built for a previous version will often fail silently, create visual errors, or cause the game to reject the custom vehicle entirely. This chapter walks through why updates matter, how to update safely, common update-related pitfalls, and practical steps to verify that a fresh update actually restored compatibility.
Why updating solves so many mod problems is simple. The mod files connect to the core game through specific references. Those references include texture names, model indices, meta data, and engine behaviors. A single renamed asset or a shifted index in the base game can break a custom vehicle. The FiveM client itself also evolves. It may add features, tighten validation checks, or alter how it reads resource manifests. If your client or your game is behind the official release, the mod may attempt to call functions that no longer exist. Updating aligns all parts. It brings the game files, the client, and the mod ecosystem onto compatible ground.
Start with the game. For users distributing the game through a library client, make sure automatic updates are active. Enabling automatic updates ensures the core game receives critical changes without manual intervention. In the game client, verify that the library shows the game as up to date. If the client reports a pending update, allow it to finish before launching FiveM. Many people launch FiveM immediately after an update begins. That partial state can leave the game’s files inconsistent. Wait until the game fully finishes any download and installation steps.
The FiveM launcher also performs checks. When you open it, the launcher should automatically search for a newer client build. Allow the launcher to download and install the update when prompted. Do not interrupt the process. Closing the launcher early can leave temporary update files behind, which may cause further integrity checks to fail. After the update completes, restart the launcher once more. Doing so ensures the new client build loads fully and reinitializes any cached resources.
If a mod still fails after updating both components, verify the integrity of the game files. Many launchers provide a tool to check for missing or corrupted files. Use this tool to confirm that GTA V’s core assets are intact. Integrity checks repair missing library files or replace corrupted archives. Corrupted game files are a frequent silent cause of mod errors. They can let the game run, but prevent custom content from hooking in correctly. Always run an integrity check after a large OS update or after you detect irregular behavior.
Beyond automatic updating, consider how the server and mod authors publish their versions. Some servers run a specific version of FiveM or expect mods built against a particular GTA V update. If the server requires an older game state, updating your client may create a version mismatch. The reverse can also be true: a server updated to support new native calls may reject older clients. If you suspect a server-client mismatch, ask the server administration which versions they support. Testing the mod on another server can quickly confirm whether the issue is local or server-side.
When updating, watch for these common pitfalls. First, hardware restrictions like disk space can halt an update silently. Ensure you have free space before starting large updates. Second, antivirus or system security tools sometimes quarantine or block updated files. If your update stalls or fails repeatedly, temporarily disable the antivirus and re-run the update. Re-enable protection afterwards. Third, custom launcher modifications or third-party tools can interfere with the update process. Revert any launcher changes and try again.
Cache files are another source of trouble, even after a successful update. FiveM and GTA V both use caches to speed up load times. These caches sometimes hold old references that contradict the freshly updated files. After updating, clear the FiveM cache by deleting the contents of the cache and temp folders in the FiveM directory. Back up any important files first. Clearing cache forces FiveM to rebuild its resource indexes against the updated game, which often resolves load-order issues and stale metadata problems.
Reinstalling the mod is the next logical step when updating did not fix the issue. Remove the vehicle mod entirely from your resources folder. Also remove any associated xml or meta edits you added. Then re-download the mod from a trusted source and follow the installation instructions exactly. Many installation guides specify a particular folder structure or manifest entry. Missing a step can make the update process futile. If the mod author released a new version to match the recent game or client update, use that version. Often, mod pages will indicate compatibility notes, including which game client version they target.
While reinstalling the mod, pay attention to the resource manifest. A resource manifest mismatch can prevent FiveM from recognizing the mod as a valid resource. Manifests include metadata that tells FiveM what game assets to load and in what order. If the manifest refers to deprecated API functions or if the resource name conflicts with another resource on the server, the vehicle may never appear. Rename the resource folder uniquely and ensure the manifest lists the correct files. If you’re unsure, compare your manifest against examples from the mod community.
Another useful diagnostic is to look at logs. FiveM and many servers produce readable logs during resource loading. Check the FiveM client logs for errors referencing the failed vehicle, missing assets, or permission denials. Logs often include file paths and error codes. Use those clues to locate the exact missing file or invalid manifest entry. If you see messages about rejected signatures or blocked native calls, this strongly indicates a client-server compatibility problem. Share the log lines with server admins or mod authors. They can usually interpret the messages quickly.
Testing on a different server or a local sandbox is a fast way to isolate the problem. If the mod works on a clean local server, the issue likely relates to server-side configuration or resource conflicts. If it fails locally as well, then your client or the mod files are at fault. Creating a minimal local server with only the core resources and the problematic vehicle lets you see whether the vehicle loads cleanly. This reduces noise from other mods and isolates the variable.
When a mod still refuses to load after all updates and integrity checks, check for hidden dependency issues. Some vehicles require additional resources such as shared scripts, handling files, UI assets, or audio packs. If those extras are out of date or missing, the primary vehicle mod may not function. Re-read the mod’s documentation for dependency notes. Many authors list required libraries and versions. Install or update those dependencies to match the mod’s expectations.
DLC and seasonal content also cause compatibility quirks. The base game sometimes receives new DLC that adds or renames assets. If a mod overlays a vehicle that references DLC assets, and your game lacks that DLC, the mod fails. Conversely, a mod might target a base game state that predates new DLC changes. If you use a version of the game that excludes certain DLC, consider whether that absence affects the vehicle. The integrity check will not repair missing DLC content. Instead, consult the game’s distribution platform for DLC management.
Be mindful of distribution channels for your mod files. Trusted sites often include compatibility notes and update logs. Downloading from unreliable sources can produce incomplete or altered packages. Always check the mod’s release notes for compatibility statements with the latest game and client builds. If the mod author provides a changelog, review it for mentions of the recent update you installed. Sometimes authors release patches specifically to address a recent game or FiveM update.
Server-side settings can also disable or filter certain custom content for performance or security reasons. Administrators may set up resource validation rules that blacklist certain file types. They may also manage session-wide caching strategies that control how new assets are distributed to players. If you believe the server is blocking your mod, ask the admins whether they enforce custom content restrictions. They can tell you whether the server requires mod files to be uploaded centrally or whether client-side mods are permitted.
When communicating with server staff, provide concise evidence. Include the FiveM client version, Rockstar game build number, and relevant log snippets. Describe the exact symptoms: whether the vehicle is invisible, spawning with replaced textures, or causing a crash. This precision speeds troubleshooting. It also reduces back-and-forth that stems from vague problem descriptions.
Finally, when everything else checks out, consider community support channels. Many mod authors and server administrators monitor forums and community hubs. Sharing your problem there often yields rapid feedback. Include your update steps and any integrity checks you performed. Also attach the logs and describe the exact mod version. If the author released a hotfix, they may provide a manual patch or instructions for a quick client-side workaround.
If you prefer to follow a trusted installation reference, consult this practical guide on how to install modifications car that covers resource placement and manifest tips. The guide includes common pitfalls and how to avoid them when updating both the game and FiveM.
In summary, updating GTA V and FiveM is the foundational step in repairing a non-working car mod. Updates align the game assets and platform APIs that mods depend on. After updating, clear caches, verify integrity, and reinstall the mod if necessary. Inspect manifests and logs for precise errors. Test on a minimal server to isolate variables. Confirm dependencies and server-side restrictions. Keep communication concise and evidence-based when asking for help. Following these steps will resolve most compatibility issues caused by version mismatches and corrupted files.
For community support, additional troubleshooting, and to check for known update-related bugs, consult the official community forum: https://forum.fivem.net
Final thoughts
In the world of FiveM, car modifications are not just aesthetic changes but expressions of identity and passion for many players. While encountering issues can be daunting, knowing how to verify game files, check for conflicts, and keep everything updated can turn a frustrating experience into a seamless journey. By applying the troubleshooting techniques discussed in this guide, hobbyists, professional tuners, and restoration enthusiasts can ensure that their modifications work correctly, enhancing both gameplay and satisfaction. Remember, the FiveM community is vast and supportive – don’t hesitate to reach out for help when needed, and most importantly, enjoy the ride!