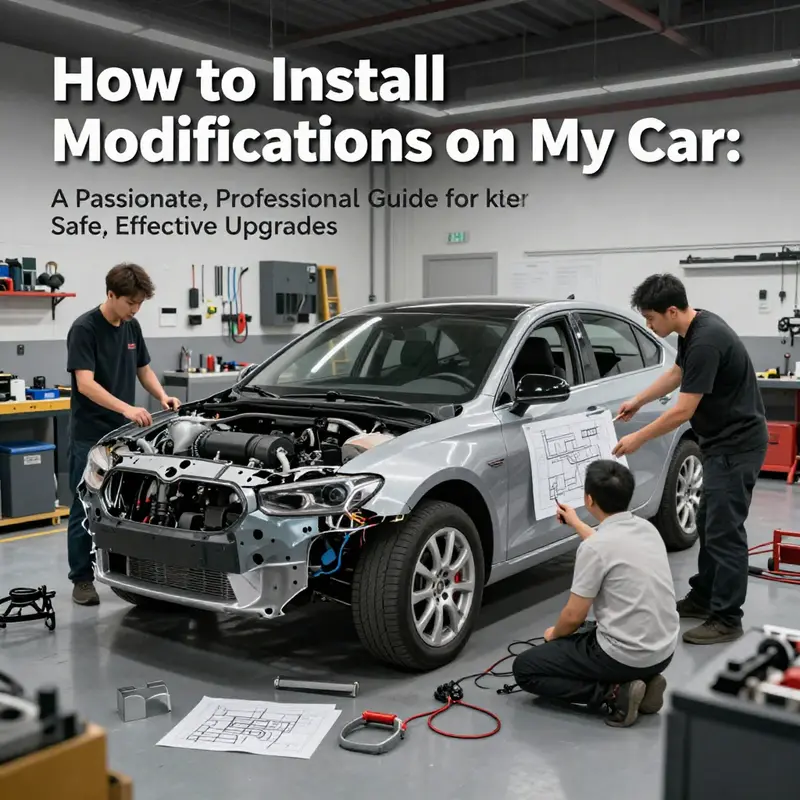
Modifying a car is a craft that blends vision with engineering. For hobbyist modifiers, professional tuners and shops, classic car restoration enthusiasts, global car modification fans, and auto parts suppliers, the journey from concept to road-ready is as much about discipline as inspiration. A well-executed upgrade begins long before the first bolt turns: it starts with a clear goal, a rigorous plan, and a respect for safety, legality, and durability. The right plan aligns your aesthetic and performance ambitions with real-world constraints—fitment, weight, airflow, electrical load, and serviceability. Choosing quality parts from reputable brands sets the foundation for long-term reliability, while an organized toolbox and proven processes keep the project progressing smoothly rather than devolving into a set of ad hoc fixes. This five-chapter framework serves as a practical blueprint for turning ambitious mods into repeatable results that survive the test of miles, weather, and time. Whether you’re a workshop-minded tuner stitching together high-end aero, a restoration specialist preserving originality with tasteful upgrades, or a parts supplier helping clients make informed choices, the path remains the same: plan thoroughly, equip yourself correctly, execute with precision, wire and illuminate safely, and honor the rules that protect you and your customers. The chapters ahead build on one another—planning and preparation, gathering tools and materials, step-by-step body kit installation, electrical and lighting best practices, and finally safety, legality, warranty implications, and aftercare. Together, they form a holistic approach to modifying your car that respects safety, boosts value, and enhances driving joy.
From Blueprint to Bolt: Planning and Preparation for Safe and Effective Car Modifications
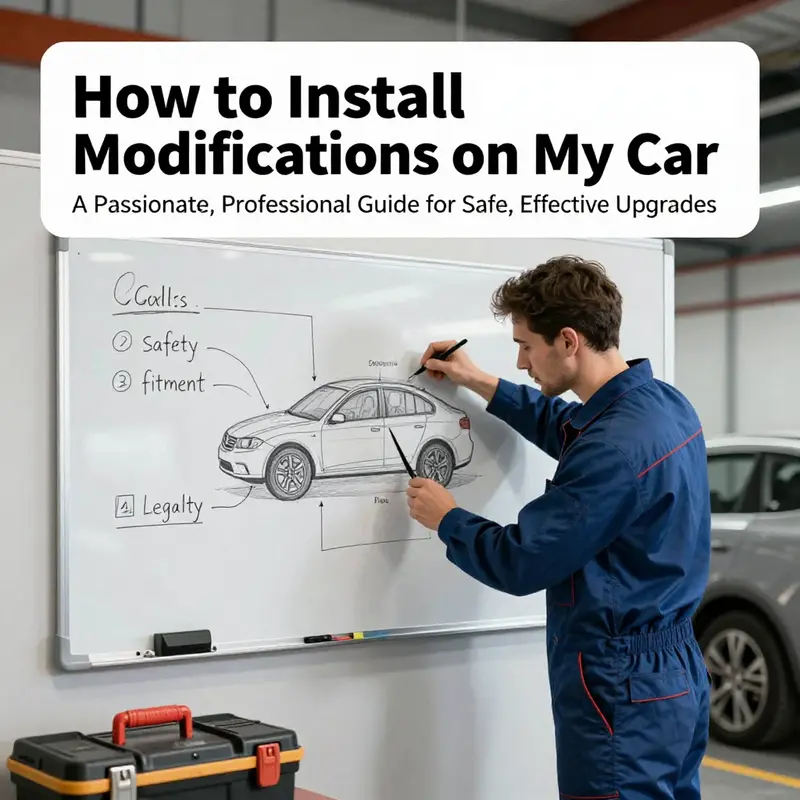
Planning and preparation are the quiet backbone of any successful car modification. They set the stage for safety, legality, and a result that not only looks right but holds up under real-world use. Before you ever loosen a fastener or unbox a new kit, you should lay a foundation that clarifies goals, confirms compatibility, and maps out a realistic course of action. This foundation isn’t about guesswork; it’s about turning ambition into a well-scoped project that respects the rules of the road, your vehicle’s design, and your own limits as a DIY or professional installer.
First, define what you want to achieve. Are you chasing sharper aesthetics, a touch of performance, or practical enhancements such as better illumination or improved aerodynamics? The answers guide every subsequent decision, from the type of parts you select to the way you approach installation. It’s equally important to research the regulatory landscape where you live. Vehicle modifications can trigger inspections, require certification, or run afoul of rules governing lighting, exhaust, or suspension. A clear understanding of local laws helps prevent costly fines, failed inspections, or the need to reverse work later. In practice, this means consulting reputable sources, and if in doubt, speaking with a professional who understands the nuances of your region. The goal is not to chase the latest trend but to pursue a compliant upgrade path that enhances your car’s character without compromising roadworthiness.
Once you have a direction, the next step is a careful assessment of your particular vehicle. Every make, model, and year has fitment quirks, electrical boundaries, and structural considerations that can dramatically affect how a modification behaves. Compatibility is more than a lighting module dropping into a bumper opening or a kit simply matching a general silhouette. It means checking fitment guides from manufacturers, verifying mounting points, and recognizing any potential conflicts with existing systems such as sensors, airbags, or the Body Control Module. When a part is advertised as universal, treat it with extra scrutiny. Universal compatibility often masks critical differences that only reveal themselves after a dry fit or under tolerance testing. If a part requires trimming, extra cuts, or reworking the mounting structure, you’re moving from a straightforward installation into a more complex project that may demand professional oversight.
With goals and compatibility in view, you can begin to shape a practical plan for parts selection. Quality matters, especially when the modification involves structural components or electrical systems. Carbon fiber body parts, for example, offer a compelling mix of light weight and strength, but they come at a premium and require careful handling to avoid cracking or misalignment. Plastics can be more affordable but may exhibit greater flex or wear over time. Metals such as aluminum can provide durability but add weight, potentially affecting handling if not matched to the vehicle’s design intent. In lighting, choosing OEM-compatible or certified LED modules helps safeguard against electrical faults, flicker, or misbehavior with vehicle controls. This decision-making phase also involves setting a budget that anticipates not just the parts themselves but the tools, fasteners, sealants, and finishing touches required to achieve a professional result. A well-planned budget should also reserve a contingency for unexpected challenges—drilled holes that need deburring, adhesive that cures longer than expected, or a wiring harness that requires a different routing than the original design.
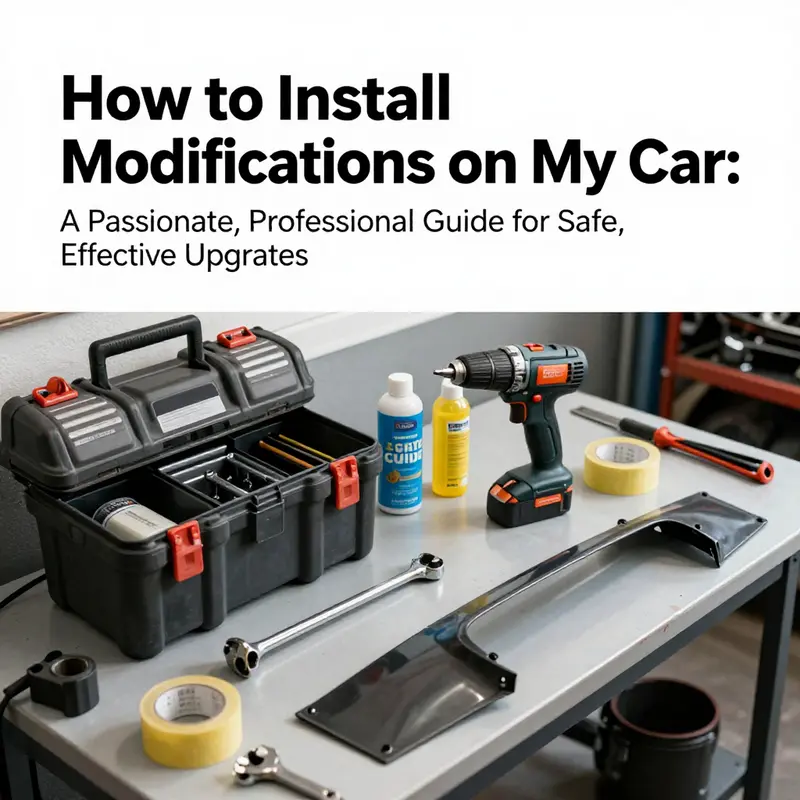
Tools and materials form the practical backbone of preparation. Having the right kit reduces risk and improves the final fit. The essentials span hand tools such as screwdrivers, wrenches, and socket sets, plus more specialized gear like an electric drill with appropriate bits, sanding supplies, and automotive-grade cleaners. Don’t overlook safety gear—gloves and protective glasses are non-negotiable. For electronics or more sophisticated improvements, you may need a diagnostic scanner, wiring kits, heat-shrink tubing, and weatherproof connectors. If you plan to modify electronic control systems, be aware that some changes require reprogramming or reconfiguring the BCM or other control modules. This is a space where professional guidance or thorough, supplier-backed instructions matter, because improper reprogramming can create drivability issues or safety risks. In short, preparation is about assembling a toolbox and a skillset that align with the scope of the project and the vehicle’s unique architecture.
A crucial outlook during planning is the balance between ambition and restraint. It’s easy to overstep the car’s original design boundaries in the name of customization, but over-modification can alter handling, braking, and aerodynamics in unintended ways. This is where a staged approach shines. Start with a test fit or dry run to verify alignment and clearance, then evaluate how the new part integrates with existing contours and systems. Mark your reference points precisely, so that future work proceeds in a reproducible and controlled manner. The process often involves one or two cycles of dry fitting, marking, and adjusting prior to any permanent attachment. If you do drill or cut, proceed slowly, deburr edges, and remove any shavings that could interfere with panels or wiring. The goal is to minimize surprises and keep every step reversible whenever possible until you are confident in the final alignment.
Documentation and traceability form another essential layer of preparation. Maintain a record of what parts were chosen, their fitment notes, and the exact sequence of steps taken during installation. This documentation proves invaluable for warranty considerations, future maintenance, or resale. It also supports a safer, more transparent approach to modifications, particularly if multiple hands or a shop perform parts of the job. While you don’t need to write a novel, a concise log of part numbers, purchase dates, and any deviations from the manufacturer’s instructions helps prevent missteps and speeds up future repairs.
As you integrate planning with practical execution, a single, well-choreographed mindset emerges: respect the vehicle’s original design while maximizing the upgrade’s value through deliberate, lawful, and carefully executed work. In other words, preparation is not a barrier to creativity; it is the scaffolding that holds your vision steady and ensures you finish with something you can live with every day. The planning phase also reinforces a useful perspective for broader discussions about modifying vehicles. It reminds builders and enthusiasts alike that even seemingly minor changes ripple through the car’s performance envelope and daily usability. When you approach a project with this awareness, you are far more likely to achieve a result that not only looks compelling but behaves reliably and within the law.
For readers who want to explore how certain modifications relate to long-term value, a deeper dive into the topic of resale value can be informative. A discussion on car modifications and resale value offers perspectives on how specific upgrades may influence market perceptions and pricing over time. car modifications and resale value
To complement this planning mindset, practitioners often consult external resources that distill years of hands-on experience into practical guidance. A reputable external guide provides a structured overview of safe and legal practices, helping align expectations with real-world constraints and costs. See this external resource for a broader perspective on safety and legality in car modifications: https://www.carinterior.com/install-car-modifications-safely-legally
null
null
Precision Fit: A Cohesive, Safe Path to Installing Body Kits and Aero Components
Upgrades to a car’s exterior are not just cosmetic; they change how the car breathes, how it sits, and how it communicates with the road. Installing body kits and aero components demands more than a quick bolt-on session. It requires a quiet workspace, the right parts, and a plan that keeps safety and integrity at the forefront. A successful upgrade begins with a clear image of the outcome—whether you want sharper styling, a touch of drama, or improved aerodynamics—and a practical sense of what your car can handle without compromising safety. In this light, the process unfolds less as a series of hurried tasks and more as a careful dialogue between the vehicle’s original design and the new lines you introduce. The goal is not merely to attach pieces; it is to achieve a seamless integration where function rides alongside form, and where every screw, edge, and seam speaks to quality rather than expediency.
From the start, planning matters. Decide on goals that are measurable and realistic: aesthetic refinement, improved airflow around the front fascia, or a small uptick in perceived performance. The choice of parts should be guided by compatibility with your exact model and year, and by the material’s properties. Carbon fiber, for instance, may offer lightness and a premium look but can be pricier than plastic. Aluminum lends durability but adds weight, while high-quality plastic can balance cost with acceptable rigidity. For lighting upgrades, pick modules that are OEM-compatible or certified for automotive use to avoid electrical quirks down the line. This careful triage—goal, quality, compatibility—sets the tone for the entire project and helps prevent the common pitfall of chasing looks at the expense of safety.
As the plan takes shape, assemble a proper toolkit and a clean workspace. A well-lit, flat area with space to lay out parts is essential. Gather screwdrivers, wrenches, sockets, a drill with appropriate bits, and abrasive tools for prepping edges. Cleaning supplies are more important than they might seem: degreasers, lint-free cloths, and a mild cleaner help remove waxy residues that can undermine adhesion and create uneven gaps later on. Masking tape, marker pens, and a straight edge are invaluable for marking mounting points and ensuring alignment remains true across the entire width of the car. Adhesives must be automotive-grade, chosen for strength and resilience in varying temperatures, and the care with which you apply them matters as much as the adhesive itself. Don’t forget safety gear—gloves and goggles—to protect hands and eyes during the cut, drill, and sand phases.
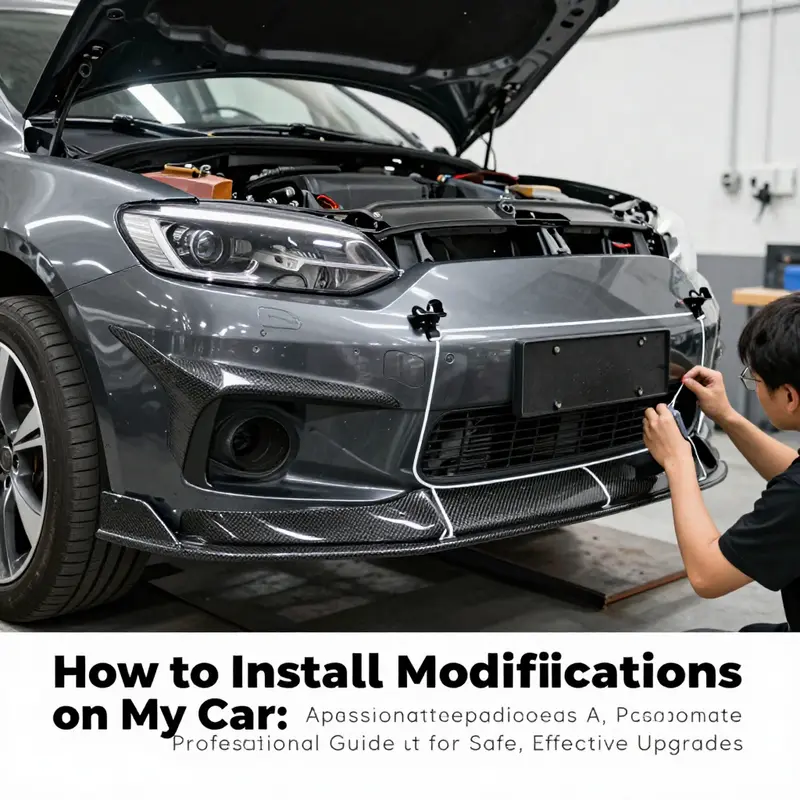
With preparation under your belt, you enter the realm of fitment. The process thrives on patience and observation. Begin by thoroughly cleaning the installation areas on the car and on each component with a degreaser to remove wax, oil, and dust. Then perform a dry fit: place the bumper, side skirts, or diffuser onto the vehicle without fastening. This step is critical. It reveals how well the pieces align with factory lines, whether there are gaps at the edges, and how the overall silhouette sits against the wheel arches. Walk all around the car, looking for any high spots or low areas where the kit does not sit flush. If discrepancies appear, lightly mark adjustment points on either the vehicle or the kit. These marks guide subsequent trimming or bending to coax the pieces into a harmonious shape that respects the original body lines.
Sometimes, minor modification to the kit is necessary to achieve a perfect fit. Use a sanding block or a fine file to address high spots, smoothing edges rather than removing large amounts of material. The rule is conservative: remove only what is needed. Overzealous sanding can weaken plastic and create cracks that will manifest after the first pothole or cold morning. Recheck the fit after each adjustment, and reassess alignment across the entire length of the installation. This iterative approach—fit, measure, adjust, recheck—keeps the project from slipping into a misaligned, goofy-looking end result.
When the dry fit is satisfactory, you proceed to drilling or bonding. If the kit uses screws, mark the mounting points with precision and drill small pilot holes on a steady, low-speed setting, taking care not to strike hidden wiring, fuel lines, or critical structural points. Deburr each hole so the screws seat cleanly without catching on rough edges. If the kit is intended to be glued, apply a thin, even bead of automotive adhesive along the contact edge. Press the panel in place, hold firmly, and allow the adhesive to set according to the manufacturer’s guidance. In both cases, alignment remains the boss. Tighten screws gradually and in a crisscross sequence where applicable to prevent warping. When adhesively bonded, support the piece during cure time—often 24 to 48 hours—away from vibrations, direct sunlight, and moisture.
The step where many projects hinge is the final alignment check. After installation, walk around the car with a critical eye. Look for uniform gaps and consistent flushness along every seam. Confirm that no edge interferes with doors, trunk lids, or the hood. Ensure the new parts do not obstruct sensors or airflow to critical components. If there are any signs of misalignment after curing, address them promptly—post-install adjustments are far easier before the adhesive fully cures than after the vehicle has heats and cools through a few cycles. Safety and appearance are not separate concerns here; they converge in the moment you verify that everything sits true and that the finish looks intentional rather than improvised.
Throughout the process, safety and legality must stay at the forefront. A modest modification can become a liability if it disrupts handling, braking performance, or visibility. Local regulations may govern lighting intensity, placement, and the allowed degree of modification. Always verify that any lighting upgrade respects brightness limits and does not create glare for oncoming traffic. Likewise, be mindful of warranty implications; many automakers reserve rights if aftermarket parts alter critical systems. The goal remains to elevate the car’s presence without compromising the vehicle’s designed performance envelope.
Aftercare completes the loop. Once the cure time has elapsed, wash the vehicle gently, avoiding direct streams on newly bonded seams for the first couple of days. Periodically re-check fasteners and mounting points, especially after driving on rough roads or after a period of suspension articulation. Tiny changes in alignment can creep in from vibration, temperature swings, or impact. If you notice any loosening, cracks, or water intrusion at seams, pause to inspect, clean, and reseal as needed. The finish will look better and last longer when you treat the installation as an ongoing relationship—periodic maintenance rather than a finish-and-forget moment.
For a practical, visual reference that mirrors many of these steps, you can consult a detailed guide on how to fit a car body kit. This resource offers step-by-step imagery and expert tips that complement the approach described here and can help you anticipate common alignment challenges before they arise. As you pursue the upgrade, keep the focus on quality over speed, on accuracy over haste, and on safety over aesthetics alone. The result will be a cohesive, professional-looking integration that respects your car’s original design while giving it a fresh, deliberate stance. If you’re planning to explore further refinements, the included step-by-step philosophy naturally extends to other aero elements—diffusers, canards, and more—so the project can evolve without losing its core emphasis on method, fit, and care.
Wiring Brightly: Safe, Legal, and Reliable Electrical Upgrades for Your Car’s Lighting
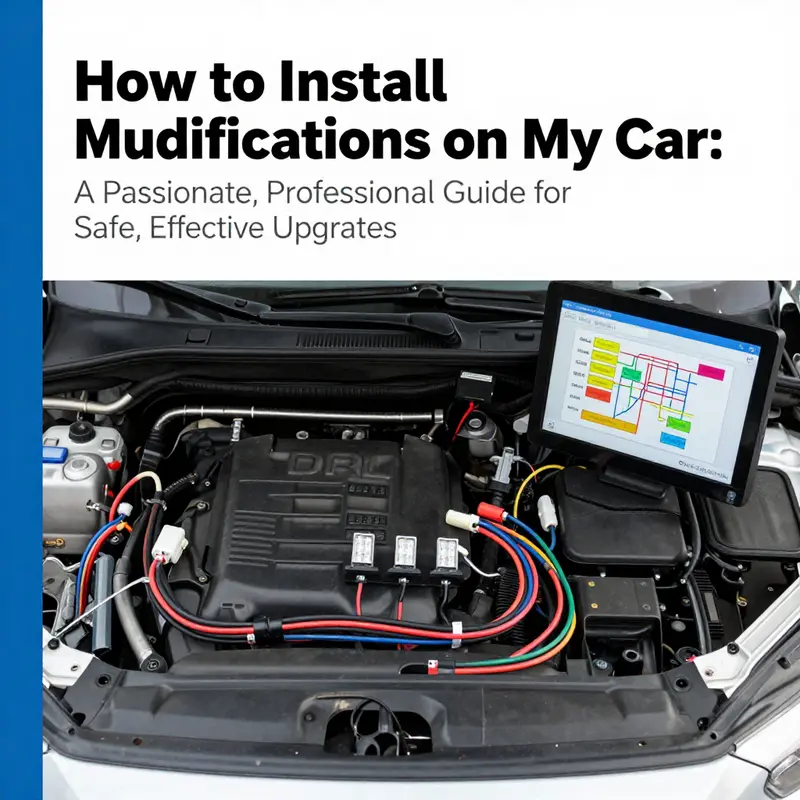
Electrical and lighting modifications sit at the intersection of aesthetics, safety, and the car’s health. When done well, they brighten the road—literally and figuratively—without disturbing the vehicle’s core systems. Poorly executed tweaks, however, can ripple through the electrical network, trigger warning lights, or even pose a fire risk. The path to a clean, professional result begins with solid preparation, a respect for the vehicle’s wiring principles, and a disciplined approach that favors reliability over flash. In this chapter, you’ll find a practical, tightly woven guide to planning, wiring best practices, and a careful step-by-step mindset for daytime running lights (DRLs) and other aftermarket lighting upgrades. The emphasis is on safeguarding the electrical system while achieving a visible improvement in safety and style, all while staying within reasonable limits of legality and warranty considerations.
Preparation forms the foundation of any electrical work. Before you touch a single wire, disconnecting the negative battery terminal is not optional—it is essential. It creates a protective barrier that minimizes the chance of short circuits while you’re manipulating live circuits or routing wires around hot engine components. Gather the right tools and materials: a multimeter for voltage checks, wire strippers, a crimping tool, insulated electrical tape, heat shrink tubing, zip ties, and the correct gauge wiring for your DRLs, typically 16–18 AWG for low-current lighting. Have a fuse holder with an inline fuse ready, ideally in the 5–10 amp range, and a variety of connectors such as ring terminals and spade connectors. While assembling parts, keep a clean workspace and a clear route plan to avoid pinching wires or creating exposed edges that could chafe against metal.
Compatibility is another cornerstone. Confirm that the lighting upgrade you’re considering matches your vehicle’s make, model, year, and existing electrical harness. Consult the vehicle manual and, if possible, online fitment guides or diagrams that map fuse locations and wiring harness points. This is the moment to visualize the entire wiring path—where you’ll tap power, where you’ll ground, and how you’ll route cables away from moving parts and heat sources. In addition to the DRL kit itself, you may encounter recommendations for a CANBUS decoder or a resistor pack to preserve proper dashboard warning behavior. Those suggestions are not gimmicks; they address a real mismatch between modern LED modules and older, linear load expectations. If you’re unsure, seek an expert opinion before proceeding. For broader context on how modifications can influence resale value and overall vehicle integrity, you can explore deeper discussions at the linked guide on car-modifications-and-resale-value.
The heart of the DRL approach is protecting the vehicle’s electrical system from unnecessary load and interference. DRLs are typically designed to engage when the engine starts and the ignition is on, adding light without requiring driver input. The most robust wiring method uses a relay to isolate the DRL load from the main headlight circuit. A 12-volt SPDT relay can be controlled by the ignition-switched circuit, ensuring the DRLs draw power only when the car is on. This setup minimizes the risk of overloading the original wiring harness and helps prevent voltage dips that could affect other electronics. Grounding should be solid and local to the mounting point. Roughly speaking, you want a clean metal surface, free of paint and corrosion, to provide a low-resistance return path for the DRL circuit. Avoid direct splicing into factory wires; instead, employ a fused tap connector that taps power with protection and preserves the integrity of the original harness.
The installation sequence for DRLs starts with a careful location choice. Position the modules so they do not interfere with sensors, airflow, or the driver’s line of sight, and ensure they comply with local regulations regarding brightness and color. Mount the units securely with brackets or adhesive pads suitable for automotive use, and verify there is no contact with moving parts. Route the wiring along existing harnesses, under trim panels, or through channels that keep cables away from heat sources, belts, or sharp edges. Use zip ties to bundle and secure, but avoid over-tightening, which can damage insulation. If you must mount in a position that requires drilling, seal and protect any penetrations to prevent water intrusion and corrosion.
Power delivery happens through a carefully placed tap point. A fused T-connector is preferred over direct wire splices because it preserves the integrity of the factory harness and facilitates easier future removal. The positive lead from the DRL should land on the fused tap, and the other end should connect to the relay’s input. The relay’s output then feeds the DRL module, while the negative lead makes a clean ground to the prepared metal surface. An inline fuse, rated 5–10A, should be placed near the power source to guard against short circuits and overcurrent conditions. After wiring, double-check all connections and insulate exposed joints with heat shrink or electrical tape, ensuring they remain sealed against moisture.
A successful DRL installation is more than a technical feat; it’s a discipline in reliability. Before you reattach the battery, do a final pass through the entire route, testing the system with the ignition on to confirm the DRLs engage automatically and without flicker. If you encounter flickering, the issue is often grounding or a loose connection. Revisit the ground point, clean the contact area, and confirm a solid, corrosion-free bond. If the dashboard shows a warning about headlight or CANBUS load, you may need to install a decoder or resistor pack that mimics the resistance of the original bulbs. This is a common, solvable issue and is best addressed by verifying all ground connections first, then testing with the adjustability of the relay to correct any voltage drop.
Legality and safety form another essential axis of responsible modification. DRLs and other lighting upgrades must meet local laws regarding brightness, color, and beam pattern. It’s easy to get caught up in the look and forget how critical proper alignment and non-glare behavior are to safe driving. Do not alter critical functions such as brake lights, turn signals, or reverse lighting unless you’re certain your changes comply with regulations and you have the necessary professional support. Modifications that interfere with safety systems or violate emissions or lighting standards can create legal exposure, void warranties, and compromise insurance.
As you move from planning to execution, a single, practical guideline helps keep the process on track: treat every new circuit as an addition to the car’s nervous system, not a replacement of its heartbeat. Respect the flow of power, protect the originals with relays and fuses, ground firmly, and enclose every connection. The goal is a clean, professional finish that looks right and works reliably in all conditions. Reflect on the broader implications of modifications, including how they might affect resale value and ongoing maintenance. For a broader discussion that ties into these considerations, you can read more at car-modifications-and-resale-value.
In practice, you’ll find that the most demanding aspects of lighting upgrades are not the illuminating parts themselves, but the quiet, careful work of routing, securing, and protecting circuits. Take your time with the dry fit, check for clearance, and plan your cable paths so that future service work remains straightforward. If in doubt, consult a certified auto electrician or opt for purpose-built kits that incorporate protective features and clear installation instructions. A well-executed electrical modification should feel integrated rather than bolted on, adding safety and confidence to every drive.
External resource for deeper guidance on LED light installation and wiring best practices can be found at https://www.pacificmotor.com.au/car-led-light-installation-guide/.
null
null
Final thoughts
The journey from concept to road-ready upgrades hinges on disciplined planning, precise execution, and vigilant stewardship of safety and legality. By starting with clear goals and a robust plan, you create a blueprint that guides part selection, fitment, and integration. Equipping yourself with the right tools and materials reduces guesswork and protects both the project timeline and the vehicle’s integrity. Following a methodical step-by-step approach for body kits and aero components ensures alignment, rigidity, and a seamless appearance that honors the car’s original lines. Taming electrical and lighting work with proper harnesses, fusing, and weatherproofing safeguards reliability and prevents parasitic drains or flicker. Finally, respecting safety standards, staying compliant with regional regulations, understanding warranty implications, and instituting a thorough aftercare routine preserves value and enhances long-term satisfaction. For enthusiasts and professionals alike, this holistic approach transforms mods into durable, high-performance upgrades that elevate the driving experience while safeguarding the car’s heritage and your reputation as a meticulous modifier.